
JITBackup for Google Workspace Setup Wizard
After successfully installing the software, you will need to complete the initial configuration through our web-based setup wizard. This brief process connects JITBackup to your preferred storage location and your Google Workspace domain.
Please have your Google Cloud Service Account credential file (.json) ready before proceeding. If needed, see Set Up Google Workspace Service Account Access.
Step 1: Configure Storage and Indexing
The first step is to define where JITBackup will store your data and its local index.
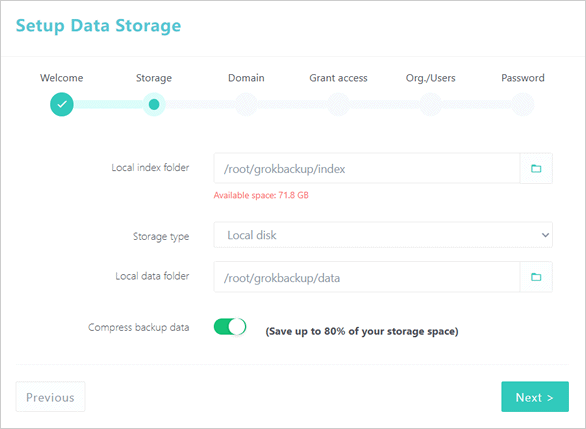
- Local index folder: Choose a local directory on your JITBackup server to store search indexes and cache files.
- Storage type: Select your preferred destination for the actual backup data. JITBackup supports:
- Local disk
- Windows Network sharing folder (UNC path)
- Amazon S3 or Compatible storage
- Microsoft Azure Storage
- Google Cloud Storage
- Compress backup data: Enable compression to reduce storage use where the data can be compressed. Actual savings vary; already compressed files may shrink very little.
Note: For optimal performance, the index folder must strictly be a local path, and it cannot share the same directory as the backup data folder.
Step 2: Connect Your Google Workspace Domain
Next, you need to connect your Google Workspace domain.
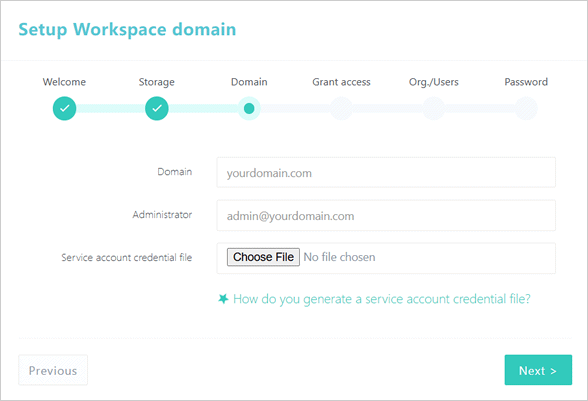
- Enter your primary Domain (e.g., yourdomain.com).
- Enter the email address of your Workspace Administrator (e.g., [email protected]).
- Upload the Service account credential file (.json) you generated using the automatic generator or Google Cloud Console.
Step 3: Authorize Domain-Wide Delegation
JITBackup uses the service account for both backup and recovery. Backups read your Workspace data, while restoring items requires write access. Authorize the complete OAuth scopes list shown by the wizard; it includes write-capable permissions for the supported apps.
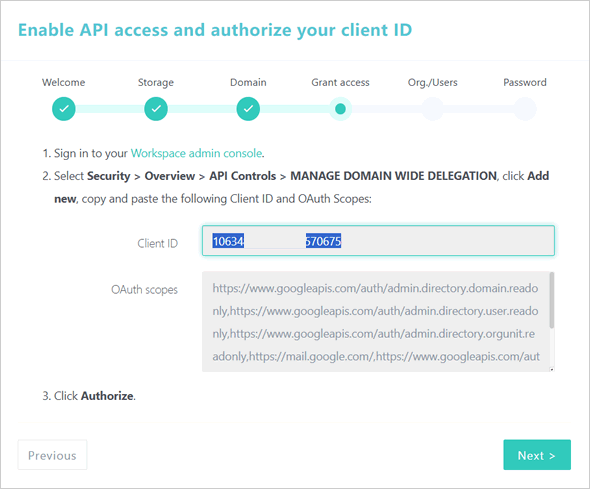
- The setup wizard will display a unique Client ID and a list of OAuth scopes.
- Open a new browser tab and sign in to your Google Workspace Admin Console.
- Navigate to Security > Access and data control > API controls > Manage Domain Wide Delegation.
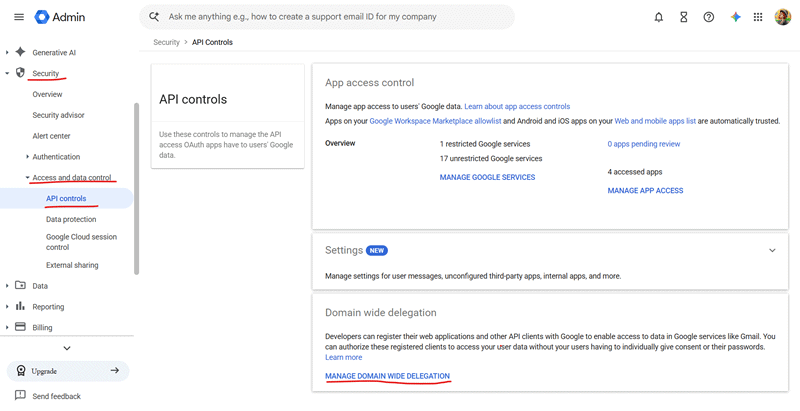
- Click Add new.
- Copy the Client ID and OAuth scopes from the JITBackup wizard and paste them into the respective fields.
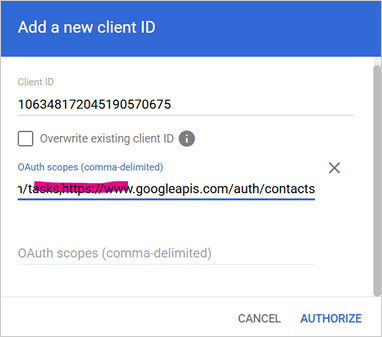
- In the Google Workspace Admin Console, click Authorize to save the domain-wide delegation settings.
- Return to the JITBackup setup wizard and continue to the next step.
Note: After you click Next in the JITBackup wizard, the button will change to Processing while the software syncs your organizational units, users, and Shared Drives list. This initial synchronization may take a few minutes depending on the volume of data.
Step 4: Choose Users to Back Up
After synchronization is complete, JITBackup will display your Workspace organizational structure for user selection.
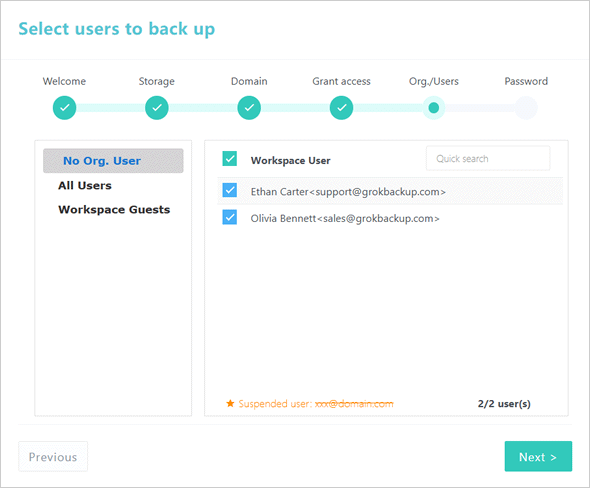
- Browse the organizational tree and check the boxes next to the users you wish to back up.
- You can select specific individuals or entire organizational units.
Note: Don't worry if you aren't sure yet—you can easily adjust your backup scope and select Shared Drives later in the Settings.
Step 5: Create the Administrator Account
Finally, set up your primary JITBackup system administrator account.
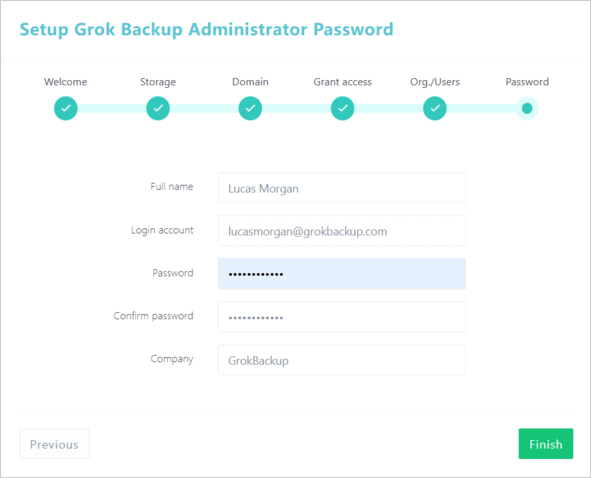
- Enter your Full name and Login account (email address).
- Set a strong Password and confirm it.
- (Optional) Enter your company name.
- Click Finish.
Note: Please enter a valid email address. This will be used for password resets.
You will be redirected to the login screen. Use the credentials you just created to access the JITBackup web console. These are separate from your Google Workspace login and the JITBackup website account used for purchases.
After Setup: Verify Your First Backup
Review the selected users, enabled apps, and schedule under Settings > Backup settings. Shared Drives are selected separately and require an active paid license. Then follow Run and check your first backup, including opening or exporting a sample item.
Completing the wizard does not confirm that your data has been backed up. Configure email reports and agree who will check the results.